Monday, February 24, 2014
The Ming What a MCM find!!
If you are into mid century furnishings, then you know Kent Coffey.
He made some wonderful, top quality pieces. I saw this one on CL, but didnt think much of it.
Until, I saw the same one in black on 1stdibs going for $8900! Say what???!!
1stdibs is an online, high-end designer goods showcase. Many designer stores in the big cities list their inventory on this site. Needless to say, I called the guy on CL to see if it was still avail. I wont tell you what I paid for it, but it was a killer deal.

The one pic below is the one for sale on 1stdibs. I liked it in black. So I copied.

And here is mine!!! Not bad, eh??

But Im getting ahead of myself. Lets watch the transformation.

By far the most difficult and time consuming part, was this hardware. And there was a lot of it! I took off each piece and marked its place. Ive found that its always best to put certain hardware back in its original place. It just fits better. These were so grimy!
I used Krud-Kutter to clean them and then steel wool and a metal cleaner (Brasso and Mothers) to try and take off the tarnish. I knew I was going to spray them with a metallic paint, but I didnt want to spray over this gunk. It wont hold up.
I used Krud-Kutter to clean them and then steel wool and a metal cleaner (Brasso and Mothers) to try and take off the tarnish. I knew I was going to spray them with a metallic paint, but I didnt want to spray over this gunk. It wont hold up.

So after many, many hours ( I spread this process out over a period of weeks) heres what I
ended up with:

Just a tad better. Now these just didnt get sprayed once and put back on. Oh no. They were sprayed, then finely sanded with steel wool, then sprayed again. Sometimes a third time if there were bad spots. Then they got a final coat of sealer. Yes, even the screws were sprayed. 3 parts to each pull.
There were 18 pulls. Uh-huh. Count with me. MISERY!!
Now the wood part. This dresser has a mahogany base. The wood finish was in bad condition. Could I have just primed and painted over it? Well yes.
Would it have looked like poop? Well yes.
Your finish is as only good as your base. I used a glossy latex enamel. In black. Its gonna show ever mar and bump. So I sanded off every bit of existing finish until I got to raw wood.

Pristine.
You dont want to paint over raw wood. I applied a wood sealer. And sanded again.
I sand so much, it probably explains why I could use my own hands as sandpaper.

In the garage and the finished top. I believe I did spray a coat of gray primer.
And I think it got 3 coats of black. I did brush it on and it came out very nice. No marks.


I really like to add a pop of color to the sides of the drawers. Its just my thing.
Red just seemed to be it.

And just because, I put some scrap book paper in the middle drawers to go with the red.

This does have a matching mirror I have to get to. With about 10 of these handle things on it!
So not looking forward to that again.


Im going to contact a store in LA to see if they would buy this to put on 1stdibs.
That other one is in Palm Beach, Fla.
That other one is in Palm Beach, Fla.
Linking up at my fave parties!! :
Kammys Korner - Trash to Treasure Tuesdays
Domestically Speaking - The Power of Paint Party
The Shabby Creek Cottage - Transformation Thursday
Miss Mustardseed - Furniture Feature Friday
Redoux - Friday Link Up Party
Funky Junk Interiors - Saturday Night Special
Knick of Time Interiors - Knick of Time Tuesday
Tuesday-Elizabeth and Co., My uncommon Slice of Suburbia,
Savvy Southern Style. Weds, Beyond the Picket Fence, PJH Designs
From my Front Porch to Yours, The 36th Avenue,
Monday-Between Naps on the Porch, The Dedicated House,
My RePurposed Life
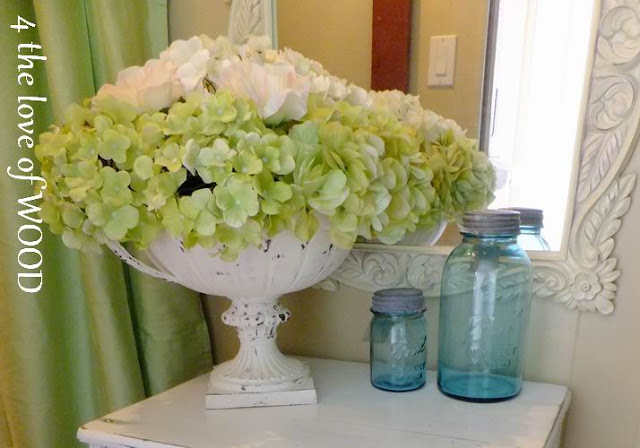
Something different
 |
| I actually got another one identical to this, CL of course! |
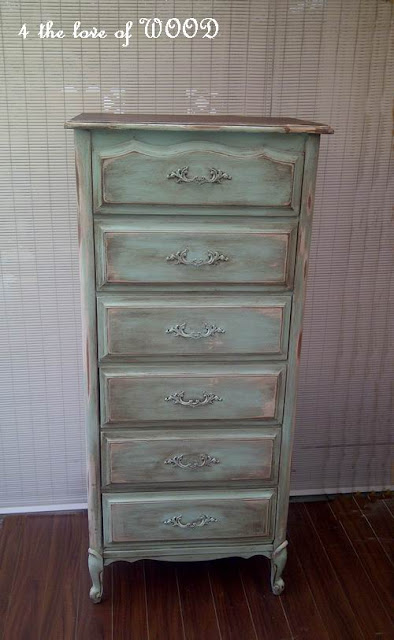
I came across a roadside rescue of a dresser from artisbeauty.net that I fell in love with! They did a phenomenal job painting their dresser.
I hate to be a total copy-cat, but I loved everything about it!
Including the color. Karin and Katie, I hope you don't mind!!

I mixed up my own green chalk paint, since I'm up to my eyeballs in paint!
I just kept adding colors until I liked the shade!
Read more »SHABBY CHIC PAINT LAYERING
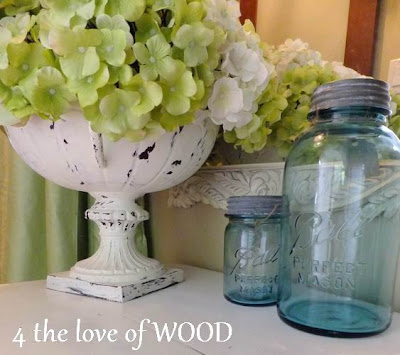
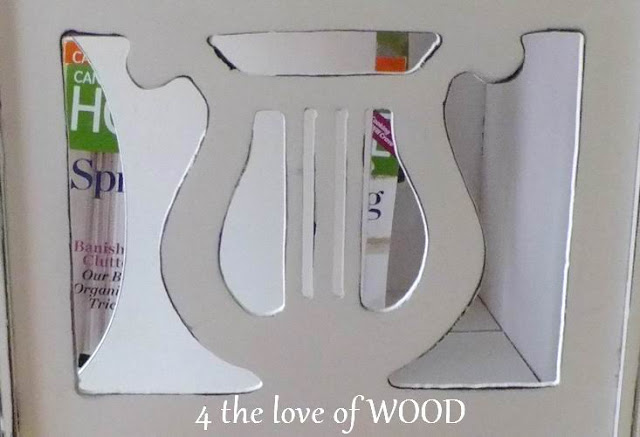
I took an old record storage table and did a 2 color paint layering to get a fun shabby chic finish.
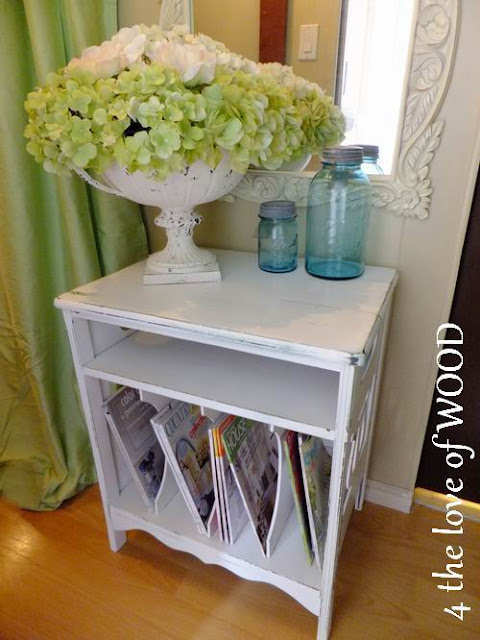
The original table was stained in a dark finish, that is the best possible base for really great looking
distressed pieces. The first color I applied on that was a soft spanish moss green, the second coat was
a bright white. Both paints were ASCP, but the green was a spur of the moment mix.
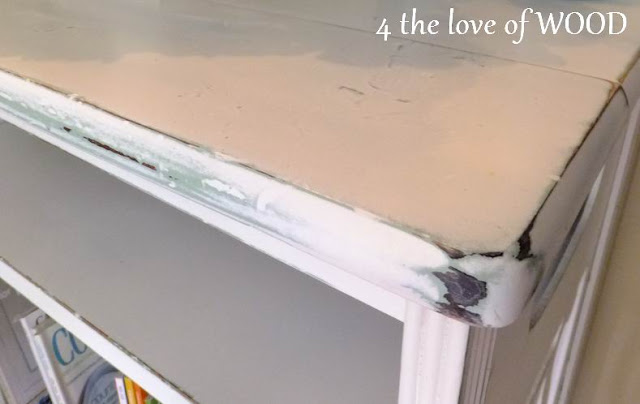
I find if you start to distress a layer paint project soon after drying the colors seem to come off together and too quickly with too much of the bottom layer not staying put, so I leave the paint to
really set up and dry for a few days so the first layer doesnt sand away as quickly.
Ive had several ppl who have tried the process talk to me about the same issues,
so it does seem to be a common issue.
Alternatively you could wax the first coat before applying the second color,
this would ensure it would hold better when sanding.


Sunday, February 23, 2014
DIFFERENT LOOKS euro tall dresser

This post is all about different finishes and how they change the look.


These 4 highboys are all the same dresser. Each of them look good but offer a different feel.
 |
| The Original French Provincial gold and white of the 60s |
 |
| Beautiful soft aqua blue |
 |
| Country Antiqued Finish |
 |
| Antiqued Finish with dark accents |
 |
| See how the darker wood and the dark hardware change the look significantly |
 |
| Painted hardware given an aged look |


(This is also a sneak peak at tomorrows post)

THE GREY GHOST deilcraft dresser
The feel of this dresser is definitely shabby chic wonderful,
and is super smooth to the touch with the finish I have applied.

It has tonnes of carved detailing every where.


The base is a soft grey and the top coat is old white.
Mixed, blended, sanded, washed, and waxed to make this beautiful look.

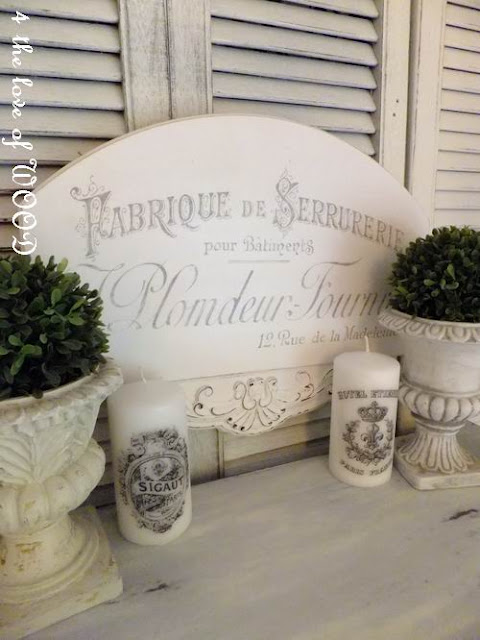

You can find a side by side before and after pic here.
Sharing with:

Sharing with:
Saturday, February 22, 2014
To Finish a Book Stand
The toil of the William and Mary Bookstand was approaching a close. I had dodged all the pit falls that could have done the both of us in and now I was to the moment in a project where it becomes make or break. The dreaded glue-up.
Now glue ups get a bad rap sometimes as a time for high stress. It can be that moment in time when all the hours sizing, planing and joining result in nothing better than flotsam driftwood floating in the cow pasture pond. It can also be that wonderful moment when all that hard work comes together into a realized piece that pulls together your individual effort, ingenuity, and creativity.
Or, preferably, the experience exists somewhere between those two extremes.
But anytime you add some moving pieces to the glue up mix, you do up the ante some.
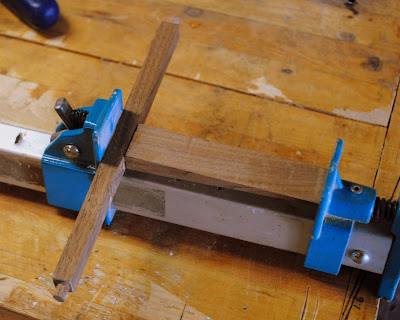 So the glue up for this book stand required a little planning and staging. In the end the simplest way for me to attack it was to move from the inside out. So the first piece is the leg and its cross member, gluing the tenon of the wedge into the mortise in the cross piece.
 Next was the frame that surrounds the leg and supports the book. The ends of the central cross piece fit into some drilled holes.
 I am a firm believer in building something to be bulletproof, or as near as possible, if you can. Joinery should be something done to last several lifetimes. To this end I decided to add a subtle little help to the corners of the inner frame with a single peg through the joint.
 The joinery of the dovetail joints of the outer frame ended up encroaching on the drilled holes for the pegs of the inner frame. I didnt want any glue to grab the pegs at all so I gave myself a little insurance and coated the pegs in a little wax.
 Then comes the glue up of the dovetails for the outer frame. Weve almost made it to home plate, but not quite yet.
 Everything was going swimmingly, then I hit the first snag of decision. Once the legs were all glued on the top flare of the nob stuck out past the frame. I hadnt rally paid attention to it on the dry fits but now, it kinda bugged me.
 I grabbed a chisel and shaved off the offending flare. I was kind of nervous making the choice, not that it would have been a momentous blunder, but it would have been something I was stuck with on this piece, right or wrong. I am happy with the choice I made, it makes the legs appear as if they are at one with the rest of the frame, where the flare I had turned had made the feet seem set apart from the frame.
The glue ups done, and the final sanding over, it was time to work towards the finish. I will readily admit that finishing is the weakest of all my skills in woodworking, so I did some more reading to solve the question of how I should tackle the task this time. I had this beautiful air dried walnut and I needed to do it justice and yet retain a look that was in congruence with the William and Mary style. My savior was Bob Flexner and his great book "Flexner on Finishing"
In that book was a specific article on finishing walnut, and it included the idea that you should use a stain to help even out the variation between the light sap wood and the dark heart wood. Heres my admission, I hadnt used a stain product in years, when I started in sawdust I often fell on the singular thought you finished pieces with a stain and polyurethane and I was always disappointed with my results. Then I happened upon the oil finishes of Danish oil and Tung oil and my world changed.
But now I was ready to put my toe back into stains. I went and perused my options at the local home center and came home with a small can of a dark finish named "Jacobean"
 I first took a scrap of the walnut I had been working with and did a test of the process and I was happy with the results so I jumped headlong into the piece.
I applied the finish and wiped it off after several minutes. Then I hit it with a hand sanding of 400 grit paper to lighten the effect a bit and expose a subtle amount of the color difference underneath the stain.
 I then applied three coats of my Maloof finish, a concoction I found in an article written by the Master himself. It is one part wipe on poly, one part boiled linseed oil, and one part tung oil. This finish adds a depth to color and grain like any top finish should but the neat thing is the "feel" of this finish under your fingers. The touch of it is a smooth, silk like feel that still translates the feel of the wood beneath. I love using it and Im glad I found it.
 With that the story of my take on the William and Mary Bookstand is pretty much over. I am very proud of this piece and all the work that went into it, more challenge than I imagined when I first spied it on the pages of popular woodworking and thought, "hmmm, that would be a cool weekend project" but the fun and enjoyment in this piece came in the discovery of it nuances. I appreciate subtlety, and this piece is subtle in its challenge to the craftsman.
In the end I think that makes it a very worthwhile piece to spend some time with. There are many lessons to learn, not just when it comes to joinery and planing, but more importantly, lessons in making a piece that is complex in its creation, yet simple and elegant in its appearance. There is true beauty and art in such endeavors.
To finish up this article, a couple of vanity shots of the completed piece.


 Ratione et Passionis
Oldwolf
Read More..
Now glue ups get a bad rap sometimes as a time for high stress. It can be that moment in time when all the hours sizing, planing and joining result in nothing better than flotsam driftwood floating in the cow pasture pond. It can also be that wonderful moment when all that hard work comes together into a realized piece that pulls together your individual effort, ingenuity, and creativity.
Or, preferably, the experience exists somewhere between those two extremes.
But anytime you add some moving pieces to the glue up mix, you do up the ante some.
The glue ups done, and the final sanding over, it was time to work towards the finish. I will readily admit that finishing is the weakest of all my skills in woodworking, so I did some more reading to solve the question of how I should tackle the task this time. I had this beautiful air dried walnut and I needed to do it justice and yet retain a look that was in congruence with the William and Mary style. My savior was Bob Flexner and his great book "Flexner on Finishing"
In that book was a specific article on finishing walnut, and it included the idea that you should use a stain to help even out the variation between the light sap wood and the dark heart wood. Heres my admission, I hadnt used a stain product in years, when I started in sawdust I often fell on the singular thought you finished pieces with a stain and polyurethane and I was always disappointed with my results. Then I happened upon the oil finishes of Danish oil and Tung oil and my world changed.
But now I was ready to put my toe back into stains. I went and perused my options at the local home center and came home with a small can of a dark finish named "Jacobean"
I applied the finish and wiped it off after several minutes. Then I hit it with a hand sanding of 400 grit paper to lighten the effect a bit and expose a subtle amount of the color difference underneath the stain.
In the end I think that makes it a very worthwhile piece to spend some time with. There are many lessons to learn, not just when it comes to joinery and planing, but more importantly, lessons in making a piece that is complex in its creation, yet simple and elegant in its appearance. There is true beauty and art in such endeavors.
To finish up this article, a couple of vanity shots of the completed piece.
Oldwolf
Subscribe to:
Posts (Atom)